 Chinese
 Korean
 Japanese
Installation Procedure for the HARDLOCK Nut (HLN)
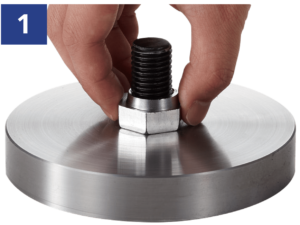
1. Hand-Tighten the Convex Nut (Bottom Nut)
Secure the Convex Nut onto the bolt by hand.
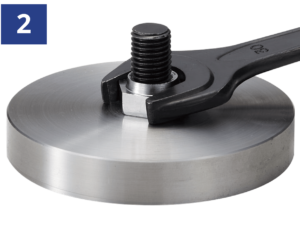
2. Torque the Convex Nut
Using a tightening tool (e.g., torque wrench or spanner), torque the Convex Nut to your specified value.
The Convex Nut has the same strength class as a standard hexagon nut and can be tightened in the same manner.
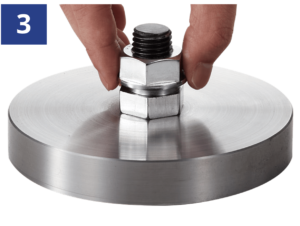
3. Hand-Tighten the Concave Nut (Top Nut)
Hand tighten the Concave Nut onto the Convex Nut.
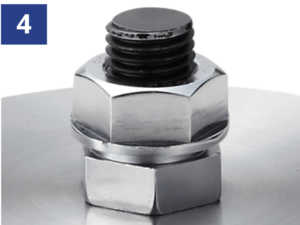
4. Verify Gap Between Nuts
Ensure there is a gap of approximately one thread pitch between the nuts.
If no gap is present after hand-tightening, the locking effect may be insufficient. This could indicate a faulty bolt or worn wedge on the Convex Nut. In such cases, refrain from use.
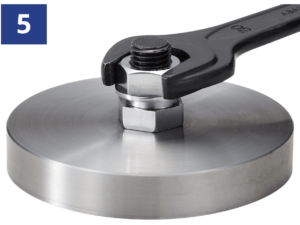
5. Torque the Concave Nut
Use a tightening tool to torque the Concave Nut to the value specified by HARDLOCK Industry Co., Ltd.
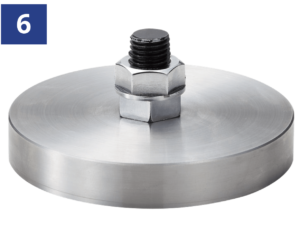
6. Installation Complete
The assembly is now complete.
To disassemble, remove the Concave Nut first, followed by the Convex Nut. Proceed with the standard installation process for reuse.